
 Live Chat

Using WireGuard on Windows
Introduction
This is the official WireGuard app for Windows, not the VPN Safe Windows app. Use it when you want the upstream client, or when you already have a .conf file from the Client Area.
Installer: wireguard-installer.exe
Configs: Client Area > VPN service > city > download WireGuard config.
Install
- Download and run the official WireGuard installer.
- Open WireGuard. You will see an empty Tunnels list and an Add Tunnel button.
Import the config
- Download a
.conffrom the Client Area (example name:acc465234913-London-1-10GB.conf). - In WireGuard click Add Tunnel (or the small arrow next to it) and choose the file.
- The tunnel appears in the left list.
Connect
- Select the tunnel.
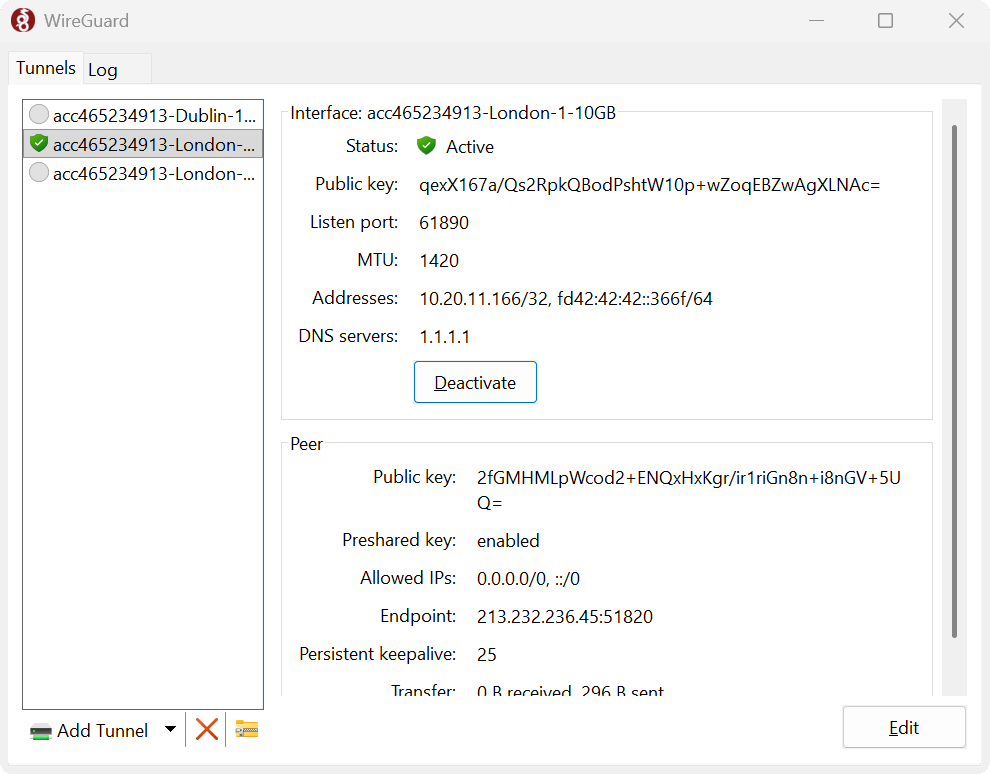
- Click Activate. Status becomes a green tick and Active.
- Click Deactivate to disconnect.
A working tunnel shows MTU 1420, DNS (often 1.1.1.1 in the file), Allowed IPs 0.0.0.0/0, ::/0, endpoint on UDP 51820, and persistent keepalive 25. Check vpnsafe.net/whats-my-ip.
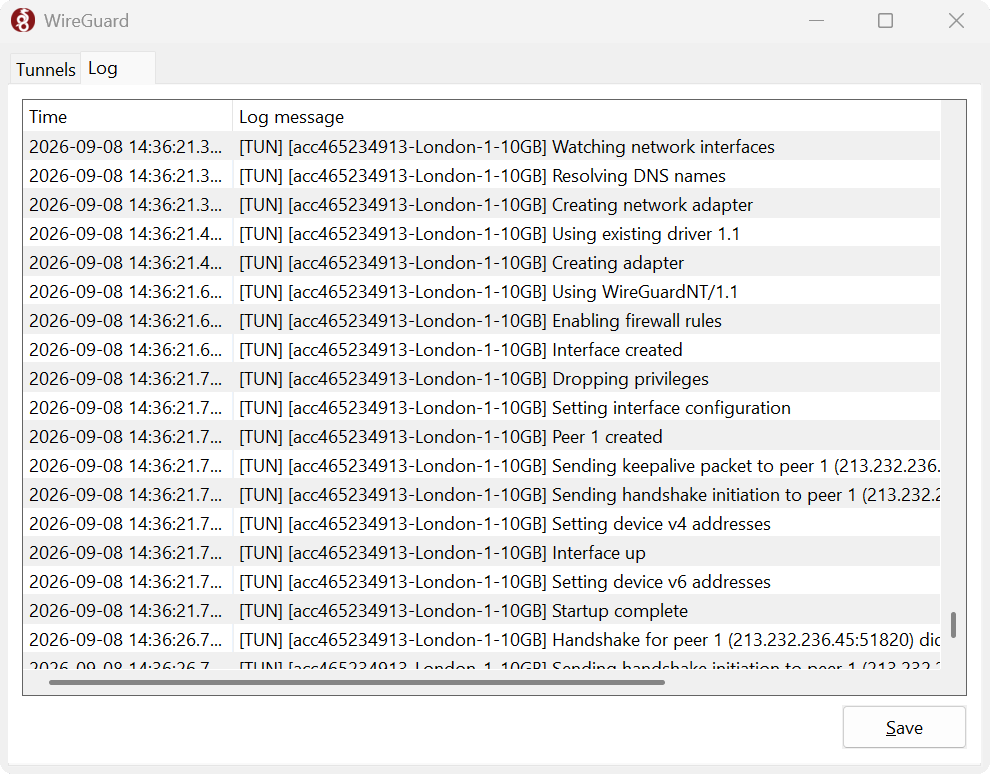
If Activate fails, open the Log tab. You want Startup complete and a handshake. Handshake timeouts usually mean UDP 51820 is blocked — try another city config, or use the VPN Safe app with OpenVPN TCP / Stealth Mode instead.
One config per device. Do not run this official client and the VPN Safe Windows app at the same time.
This article is also in the client area knowledge base.