
 Live Chat

Changing DNS in the Windows App
Introduction
DNS turns website names into IP addresses. The Windows app sends those lookups through the VPN using the resolver you pick in Settings. The default in the screenshots is Quad9 (9.9.9.9).
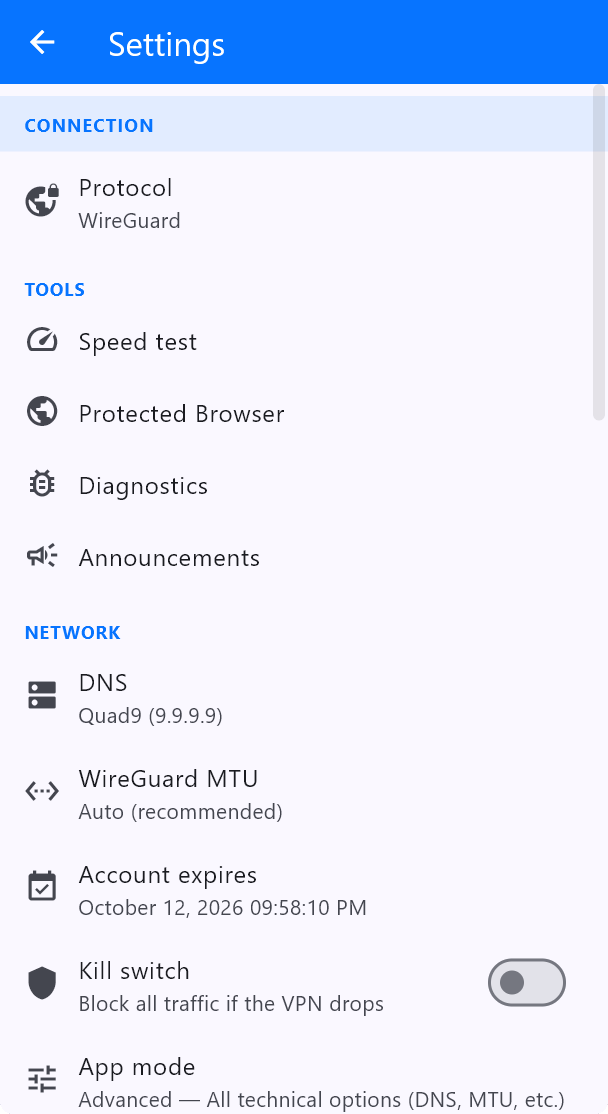
Change DNS
- Open the app and tap the gear (Settings).
- If you do not see DNS, set App mode to Advanced — All technical options (DNS, MTU, etc.).
- Under NETWORK, tap DNS.
- Choose a resolver, then reconnect if you are already online.
Resolvers in the app
- Quad9 (9.9.9.9) — Privacy-focused DNS that also blocks known malicious domains. Default in the current app.
- Cloudflare (1.1.1.1) — Fast public DNS (also 1.0.0.1).
- Google (8.8.8.8) — Google Public DNS (also 8.8.4.4).
- AdGuard (94.140.14.14) — DNS that filters ads and trackers at the lookup level.
- Custom DNS — Enter your own resolver if you use NextDNS, a Pi-hole, or another provider.
Ads and trackers
Separately, Settings > PROTECTION > Block ads & trackers filters ads, trackers and malware via DNS. You can leave Quad9 selected and still use that toggle, or pick AdGuard if you want filtering in the resolver itself.
After changing DNS, visit vpnsafe.net/whats-my-ip and a leak test such as dnsleaktest.com while connected. Lookups should not go to your ISP.
This article is also in the client area knowledge base.