
 Live Chat

Importing a VPN Safe Config into the Official WireGuard App
Introduction
You can use the official WireGuard app instead of (or as well as) the VPN Safe Windows app. Download a per-server config from the Client Area, import it, and press Activate. This is useful on machines where you want the upstream WireGuard client, or on routers that take a .conf file.
Official Windows installer: wireguard-installer.exe
Configs: Client Area > your VPN service > server location > download WireGuard config.
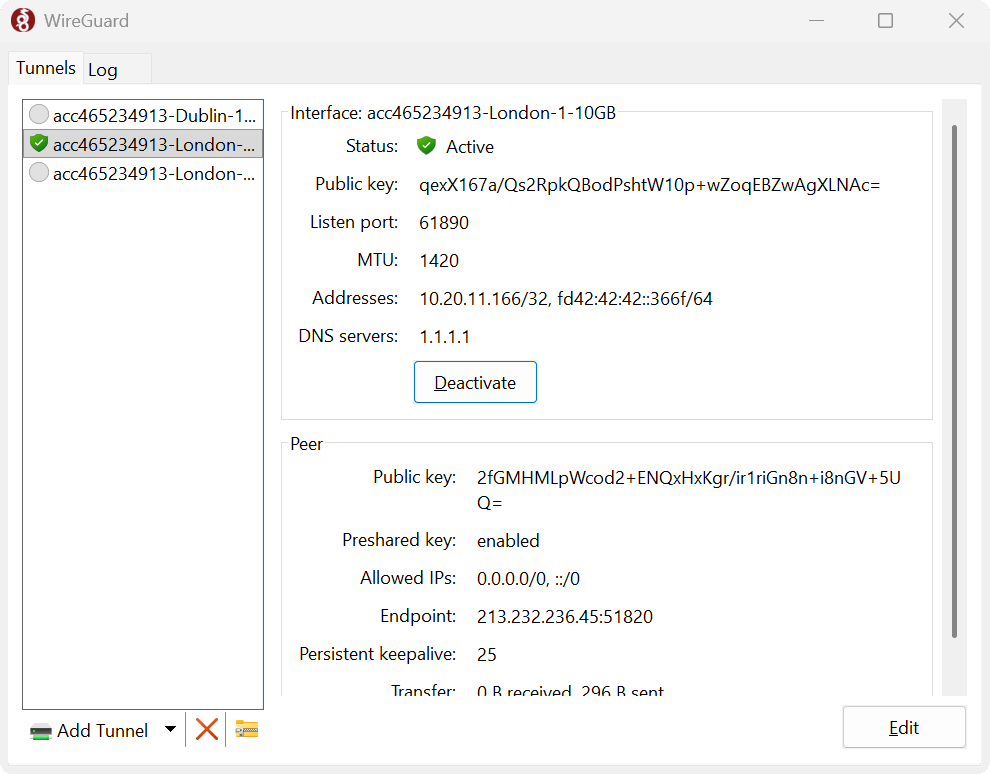
Import and activate
- Install WireGuard and open it.
- Click Add Tunnel and select the downloaded
.conffile. Tunnels are named likeacc465234913-London-1-10GB. - Select the tunnel and click Activate.
- Status should show a green tick and Active.
What the details mean
- MTU: 1420 — typical VPN Safe WireGuard MTU.
- DNS servers: 1.1.1.1 — this config uses Cloudflare. The VPN Safe app default is Quad9; both are fine.
- Allowed IPs: 0.0.0.0/0, ::/0 — all IPv4 and IPv6 goes through the tunnel.
- Persistent keepalive: 25 — keeps NAT mappings alive.
- Addresses — your tunnel IPs (example 10.20.11.166/32).
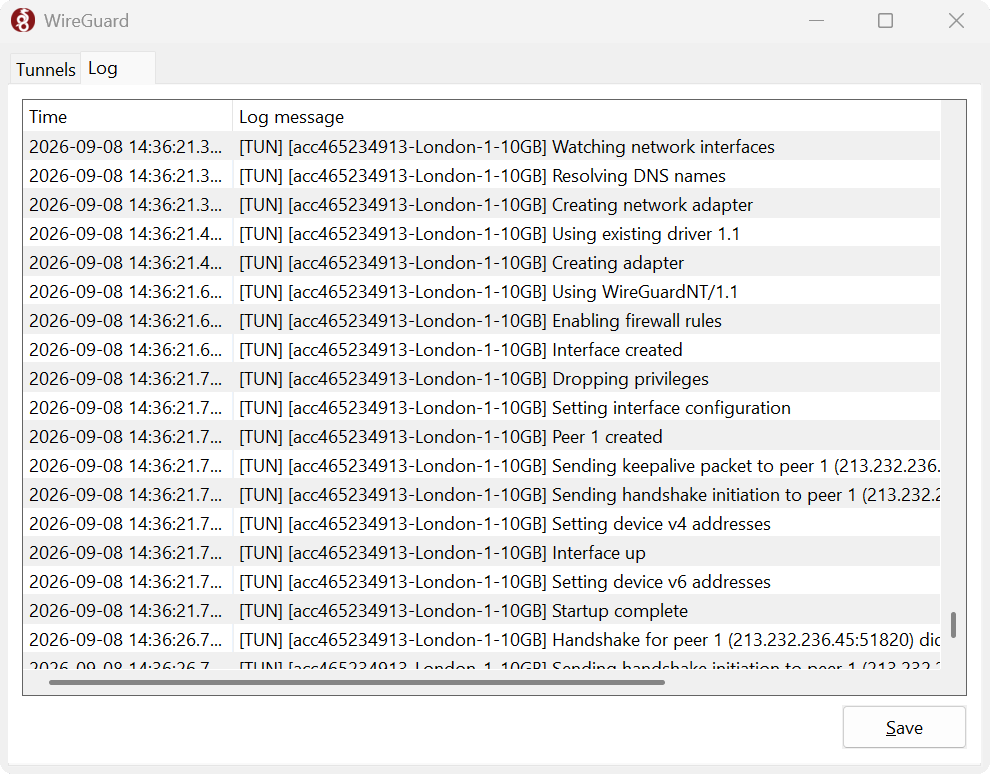
If it will not connect
Open the Log tab. A healthy start looks like: creating network adapter, enabling firewall rules, handshake initiation, Startup complete. If the handshake dies, try another city config, check UDP 51820 is not blocked, or use the VPN Safe app with OpenVPN TCP / Stealth Mode on that network.
Generate a separate config (key pair) per device. Reusing one config on two devices at once will drop the other session.
This article is also in the client area knowledge base.